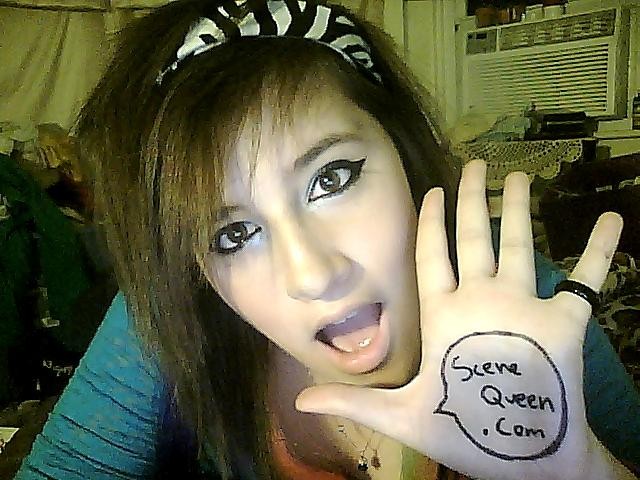
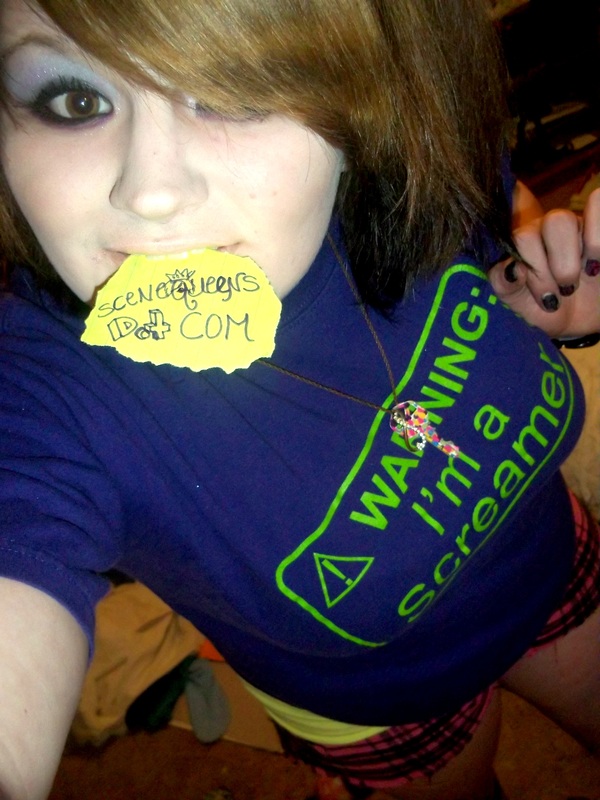
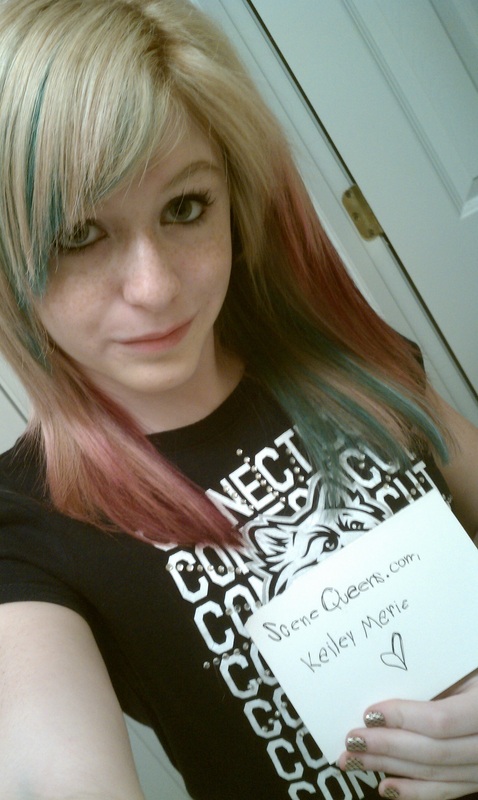
Maddem Money
~HOW I DO MY MAKEUP~
The essence of the emo looks is relatively nature.
In most cases, the most distinguishing factor is the eyes. You can achieve the natural look by only concentrating your makeup efforts on your eyes,
or you can still get a comparatively natural look by doing the whole shebang.
Foundation:
If your skin is fairly smooth and acne free,
you’ll probably want to leave out using foundation completely.
Otherwise,
you should start with a skin tone concealer on the more blotchy spots of your face.
When you have finished applying concealer then it’s time for the foundation. There are two options for achieving the perfect emo look. Either go skin tone, which will give you a more overall natural look,
or choose a shade or two lighter to give yourself a more pale complexion,
which can give your eyes a nice pop with the right eye makeup.
How to apply concealer:
Apply several small drops of concealer onto the spots on your face that you wish to conceal,
then use the pad of your index for middle finger to tap it in.
It is imperative that the color of your concealer match your skin tone.
You can also apply concealer to the underneath of your eyes to help get rid of dark circles.
How to apply liquid foundation:
If you are going to use liquid foundation then you need to apply it before the concealer,
otherwise when you go to apply it over the concealer,
sponge will wipe the concealer away and you’ll need to reapply it after you’re done applying your foundation.
To start apply foundation,
you will need a sponge.
First dip the sponge in water.
It needs to be damp,
not completely saturated.
Why do we do this?
Well,
if the sponge is dry then it will soak up the foundation and waste some of it.
If the sponge is damp then the foundation will sit on top of it and glide onto your face easily.
Put a small amount of liquid foundation onto your sponge.
Remember that,
oftentimes,
less is more.
Now start in the center of your face and apply the foundation,
working from the center of your face towards the sides rather than up and down.
Make sure that the foundation spreads easily.
If you have picked a foundation that matches you skin tone,
and you don’t want to apply a whole bunch of makeup,
then you can use the foundation only in places that you need it as long as it flawlessly blends in with the rest of your skin.
If you have picked a lighter shade of foundation then you will obviously want to use it on your entire face.
If you find that foundation gathers in certain areas,
such as your hairline,
around your mouth,
or your eyebrows,
simply smooth it away with the sponge.
Set the foundation with loose powder,
following application.
How to apply powder foundation:
Dip your brush or compact pad into the foundation.
Apply the foundation to the center of your face,
cheeks,
forehead,
and chin and blend it outwards towards the sides of your face.
Blend until the foundation appears to vanish and become your natural skin tone.
Pay special attention to blending around areas on your face that crease,
as this is where makeup tends to build up and become most visible.
Once you have finished applying the foundation,
set it with loose powder.
Blush:
Most emos/scenes don’t use blush at all,
but if you are going to use it,
it should be used sparingly.
When purchasing blush,
choose a light shade that matches the color of your cheeks after you have finished exercising.
This is your natural blushing color.
If you have dry skin,
you may want to use a cream blush as it will help to keep your face hydrated.
If you have oily skin,
then you’re skin is better suited for a type of powder blush.
You will want to have finished applying your concealer,
foundation,
and eye makeup before you begin applying blush.
How to apply blush:
If you are using powder blush then you will start by placing a small amount of blush on your brush and then tapping it gently to knock off any excess blush so that you don’t apply too much.
If you are using cream blush them apply a small amount to your middle finger.
Next,
look in the mirror and smile.
If you are using powder blush,
you will want to place the brush on the apple of your cheek and gently brush up from your cheekbone towards your hairline.
If you are using cream blush then dot it at the beginning of the apple of your cheek and gently blend it up the cheekbone toward the hairline.
Eye Shadow Most emos/scenes opt for black or smoky eye shadows to give the eye make up a more dramatic effect and to help the color of the eyes stand out more.
Applying eye shadow should be the first step in the eye makeup process.
How to apply eye shadow:
Start by dusting your eyelids with a small amount of loose powder.
This will keep the eye shadow from causing that horrid eye makeup clumping that tends to happen at the crease of the eye lid.
It will also help your eye shadow to stay on all day long instead of smearing it off.
If you plan on using a lighter base color,
then start by using a shadow brush to apply your base color from brow to lash line,
sweeping across your entire eyelid.
For your main color,
apply to the entire eye lid,
stopping at the crease.
Blend the two tones of eye shadows together by stroking your eye lid gently at the blending point with an eye shadow brush. Do not use your finger as you could wipe off the eye shadow entirely and/or create a big mess.
Eye Liner:
All emos/scenes who do not go for the completely natural look wear fairly dramatic eye makeup.
Using pencil eye liner will not give your eyes as much of a stand out dramatic affect as liquid eye liners do.
For that reason,
in this tutorial I’m only going to teach how to apply liquid eye liner.
Most emos/scenes wear black eye liner only,
but you can experiment with different colors as you like.
Use eye liner after you’ve applied your eye shadow and before you’ve applied your mascara.
How to apply eye liner:
Rest the elbow of the hand that you’re going to use to apply your eyeliner on a hard surface and rest the wrist of that hand against your face.
Tilt your head back slowly and open your eyes halfway.
This allows you to see what you’re doing while also giving you a good angle for application.
Draw a line across the upper lid of the last line,
as close to the lashes as possible while still remaining on the lid.
This will help create the illusion of longer lashes.
For a more dramatic affect,
you can make this line thicker.
Once you have done this,
wait for a couple of seconds to allow the liquid liner to dry before you completely open your eyes,
otherwise it will transfer onto your eyelids when you open your eyes and create a mess.
Follow the same steps for your lower eye lid.
If you mess up,
you can remove the eye liner by tipping the tip of a cotton swab into some eye make up remover and rubbing it over the eye liner.
Needless to say,
be careful not to get it in your eyes.
Mascara:
A lot of emo/scene girls who like the more dramatic effect will opt to apply fake eye lashes.
This can look very cute on the right girl and is a popular practice of the emo/scene culture.
For those of us who don’t have the patience to do that,
here’s a mascara tutorial.
There are tons of different types of mascara to choose from.
For the purpose of emo/scene makeup,
it’s recommended that you choose a brand that is designed for lengthening.
Most emos/scenes wear black mascara.
Applying mascara is the last step in the eye makeup process.
How to apply mascara:
Start by curling your eyelashes.
Remove the wand from the mascara tube in one pull.
Do not pump it in and out.
This pushes air into the tube which dries out your mascara. Holding the wand parallel to your eyelid,
apply the mascara starting with the underside of your upper lashes,
moving the brush slowly upward from the base of your lashes to their tips.
To separate your eye lashes and keep them from clumping together,
roll the brush slowly on the upward stroke.
This is a step that so many people miss and is the main cause of ugly clumping eye lashes.
Allow the first coat of mascara to dry and then apply a second coat using the same steps mentioned above.
If your eye lashes do happen to clump together,
you can separate them before they dry with an eye lash comb. If you applied too much mascara,
you can blot your eye lashes with tissue paper to remove the excess.
For the lower lashes,
repeat the above steps,
stroking downward from the base of the eyelash to the tip. Only apply one coat of mascara as opposed to the two coats that you use on the upper eye lashes.
To remove any mascara that may have accidentally gotten onto your face,
use a cotton swab with a small amount of eye makeup remover to blot the stray mascara away.
Lip Gloss:
Most emos/scene I know don’t wear lip stick.
Those that do choose to go with a natural tone.
Many,
however,
do wear lip gloss.
It makes the lips shine all pretty like,
keeps them hydrated,
and usually either smells and/or tastes fruity.
Yum!
How to apply lip gloss:
The process of applying lip gloss is fairly simple and straight forward.
For liquid lip gloss,
take the applicator stick and rub the gloss on your lips, evenly distributing it.
For roll-on lip gloss,
roll the roller across your lips,
starting with your bottom lip and then the top lip.
For tube lip gloss,
put a small amount on your finger and rub it on your lips,
evenly distributing it.
Try not to apply the lip gloss too thick as this can cause it to cake at the sides of your mouth and look gross.
Also,
you don’t want to be eating it.
If you accidentally apply outside of your lip line,
wipe the excess lip gloss off with a tissue,
as wet lip gross on skin is also very unattractive.
Do not blot the lip gloss once it is applied.
This will cause it to lose it’s shine and thusly defeat the purpose of applying it in the first place.
If you want,
you can apply lip gloss after you apply your lip stick.
I think this is more of a book than an article.
Lol Anyway,
there you have it folks,
how to apply emo/scene makeup.
Shannon Cakesters

~Cutting Your Hair Scene~
You will need:a razor comb or scissors
Cutting your own hair scene style can be accomplished with a little instruction. The scene style includes cuts for short, mid-length and long hair. The great thing about cutting your own scene hair is that you control the design and of course, it saves you money. All you need is a razor comb or scissors.
Scene hair usually requires some layering. That is because it is an easy way to change style while adding movement and texture. In fact, hair that is irregular and not symmetrical is the essence of scene. The cuts work best on straight hair. Face framing is a favorite. Long bang shroud the face in the way a picture frame adds to a painting. The angles of the faces are well defined with this cut. Interior layering is another scene cut; layers are cut in the mid section of the hair to lift the hair and add volume. It adds showcases movement and wispy ends. Finally, long layers can be used effectively in a scene style when combined with an edgy bang.
You can cut your own scene hair using a razor comb. A razor comb is best on thicker hair. First, you shampoo and condition your hair. Comb out your wet hair. Next, pull up your top layer and clip it in place. Comb out your bottom layer and place the razor where your top layer ends. Using a light touch, drag the razor comb down. Repeat this process all around your head. Once you have completed the bottom layer, take the clip out of the top layer. Drag the razor comb lightly on your top layer to make it choppy. You can also razor cut your bangs to make them choppy, following the same step as the top layer.
You may want to go to a hairstylist and have them razor cut it the first time. Go to a salon that does scene hair. Find out where the local people with the scene cuts go. After it is professionally cut, you can maintain it by cutting the hair with a razor. The optimal blades to use are double or single blade razors.
Another look that is scene is shaggy, choppy or blunt cuts. The key is not to try to be perfect with cutting your hair. Your hair should look sloppy or messy when you are finished. You cut with scissors at an angle and then back again. You never cut straight across your bangs, always at an angle. The key is to have varying lengths which will help you create different styles with styling techniques or styling products.
Long hair for girls and guys in the scene style requires some maintenance. There are some universal rules for both sexes with the scene look. First, you must trim your own split ends about every six weeks for good hair health. Guys with long hair should not add a lot of layers. Girls can add choppy layers at the top of their long hair with more success.
BringCasTheHorizon (:
How to get scene hair (poofy) without teasing or hairspray!
Things you'll need:
roller brush.
straightner.
good blow dryer.
Step 1: make sure your hair is damp.
Step 2: Get the top layer/part of your hair from one side and place the roller brush under it. blow dry that part whiler moving the brush upward.
Step 3: do this to the top layer on the other side .
Step 4: do it to the rest of your layers above yoour ear. i do it to three parts on each side.
Step 5: straighten your hair...but WAIT! only straighten the bottom Part of your hair!
Step 6: add a bow or headband and badabing! purttyful!
Jazzmyn Jealousy
~Scene Hair~
Your hair should be layered and colorful! If you decide to dye your hair black, add a couple of neon highlights. If your hair is naturally dark, consider dying it platinum blond, or a funky color like purple or pink. If you don't want to dye your hair, or your parents won't let you, get clip-in extensions, but don't get cheap ones; get good ones that actually look real. Bangs look good on any face, and your hair can be straight, curly, long, or short. Another cute idea is that if you have long hair (or extensions), you can curl a few pieces and leave the rest straight. You can put a stretchy headband over the top of your head (with your bangs out), but that's optional. If you don't feel like dying your hair different colors, then use extensions. There are many girls who have long hair with tons of teased layers all throughout it. You can never go wrong, as long as you're original! Also, never do anything to yourself if you feel uncomfortable. <3 :)
Your hair should be layered and colorful! If you decide to dye your hair black, add a couple of neon highlights. If your hair is naturally dark, consider dying it platinum blond, or a funky color like purple or pink. If you don't want to dye your hair, or your parents won't let you, get clip-in extensions, but don't get cheap ones; get good ones that actually look real. Bangs look good on any face, and your hair can be straight, curly, long, or short. Another cute idea is that if you have long hair (or extensions), you can curl a few pieces and leave the rest straight. You can put a stretchy headband over the top of your head (with your bangs out), but that's optional. If you don't feel like dying your hair different colors, then use extensions. There are many girls who have long hair with tons of teased layers all throughout it. You can never go wrong, as long as you're original! Also, never do anything to yourself if you feel uncomfortable. <3 :)
Hayley Horizon

How To Be A Scene Zombie
1. Do some color spray your hair or dye it many colors
2. Okay do your hair the scene way
3. Add a chelsea smile you know lips cut on each side with stitches
4. Do whatever else you think a zombie looks like
5 Wear colorful things! Yay!
1. Do some color spray your hair or dye it many colors
2. Okay do your hair the scene way
3. Add a chelsea smile you know lips cut on each side with stitches
4. Do whatever else you think a zombie looks like
5 Wear colorful things! Yay!
Raaginxcrayon Scribbles
Hi guys (: I can't find my old 'scene queen' article on here so I am making a new one. And heres my article. Hope you enjoy!
People has many different opinions on 'scene kids.' I personally think that the try hard scene kids look the same, for example... "Following the same trneds at the same time. It seems as so no one is original anymore. This is why everone gets made fun of. Whichever lable people call you are, you are still your own person. And no one can take that away from you.
People has many different opinions on 'scene kids.' I personally think that the try hard scene kids look the same, for example... "Following the same trneds at the same time. It seems as so no one is original anymore. This is why everone gets made fun of. Whichever lable people call you are, you are still your own person. And no one can take that away from you.
Melanie Amphetamine
Hello there:3
I'm Melanie(:
I like rock music and being weird.
People said i should be a a site model so I joined this website.(:
FUNNNNNN! Any who, I love you!:D
I'm Melanie(:
I like rock music and being weird.
People said i should be a a site model so I joined this website.(:
FUNNNNNN! Any who, I love you!:D
Starry Suicide

Scene:
The "scene" trend is becoming more and more popular. Teens choose to express individuality in daring and rebellious ways. Layered hair, dark make-up, and skinny jeans are all bits of the scene or indie culture.
Hair: Scene hair is usually very choppy with short and random layers. It is almost always black, blonde, or bright, neon colours. Accessories such as bows, headbands, or bandanas may also accompany this hairstyle. Scenesters often tease their hair.
Makeup: Scene kids usually wear black, white, or bright eyeshadow with dark and thick eyeliner. Some scenesters may even use eyeline to draw designs such as a heart or a star next to their eyes.
Style: Skinny jeans, band tee's, and tu-tus are a must if you want to be scene. Scene kids also wear studded belts, necklaces, and bracelets may occomodate your outfits. Brands such as Pokemon, Hello Kitty, Domo, and brass knuckles are popular in the scene culture.
Being scene isn't just a style, or something to do for fun, it's a lifestyle. You can't back out, and you can't go halfway. If you're gonna be scene, you have to do it right.
Ally Helene
how to tease your hair:
1 Make sure your hair was just washed, It is hard to tease greasy hair. If you don't have layers next time you get your hair cut get alot of medium and short length layers to make your teased hair turn out better.
2 Straighten your entire head of hair, If you don't already have straight hair.
3 Then section your hair into decent sized pieces that are easy to work with
4 Starting with the first layers of hair at the very top of your scalp line, grab one section at a time. Spray it with hairspray then begin combing your hair backwards from the tip of that section you grabbed all the way to the root. Repeat this a couple of times to each section.
5 Once you've teased the first row of hair your going to pin it up and repeat this about one or two more times underneath that layer of hair. Be sure to spray every strand with hairspray right before you begin to tease it.
6 After teasing two to three layers of hair pull it back down normally out of your face gently with your hands. If your hair isn't big enough for you simply go back over, Add more hairspray, And repeat the teasing process again.
7 Brush the top layer of teased hair gently to keep your hair from looking like a tangled mess.:)
skittles lush
so,i've been hearing ppl talking bout how scene queens are just posers that want to be models.well thats not true scene queens are beautiful young woman that express themselfs by colors,wich is the reasoning for there hair and there colorful clothes.i hate it when ppl are called posers because they choose to express themselves by a bit of color in there hair and because we have different styles.Me myslef im like this becasue i love being different from everyone else.Yea sure i be called emo,poser,cutter ect. but im happy wiht who i am and every girl in here should be happy with themselves also =)
Courtney Catastrophy

How to Tease your hair:
What you'll need:
A Comb,
hairspray,
a blowdryer,
a straightener,
and a regular brush.
What you do:
1.) part your hair into earier sections to tease it, meaning layer by layer, it'll be much easier to tease.
2.) take the straightener and straighten the piece of hair you want to tease up, ((not including the top layer of your hair))
3.) lightly spray the piece of hair you just straightened with hairspray.
4.) take the comb and use the teeth on it to pull the hair up towards your skull in order to tease it up.
5.) do this to the layers of hair you want to tease, except for the top layer of hair
6.) put the top layer of hair ((after you have straightened it)) down and spray it with hairspray gently.
7.) use your fingertips to puff it up lightly and put a cute bow or ribboon in it ((bow, ribbon, etc. is OPTIONAL!))
Ashley catastrophe!
Hi there, C: Umm, not sure what Im doing here. xD all i know is my friend put me on her computer and said "write this some where, take a picture and fill this out" so here i am. ^^ Hmm, Yea I don't know. o.o
Miss Mae
How to have long Lasting Colored Highlights.(:
1. find a washable or colorful sharpie. (it depends if you want it to come out fast or not.)
2. attach some tin-foil to your hair and lay it down it strips.
3. gently color your hair and make sure not to get your roots!!
4. you can either blow dry it, or wet your hair.
5. make sure your hair dries before you touch it and then you have your highlights!!(:
Hello Kaela
-HOW TO;
Be a Scene Queen.
1) Confidence. :) Confidence is the key. Don't care what OTHER PEOPLE think. It's all you! :) Scene isn't just having 'coon hair' or tons of makeup. It's just being crazy!!!
2) You need to know that you're pretty. LOVE and EMBRACE your flaws. Like.. who gives a s**t? :)
3) Don't get OVERconfident! NOBODY wants to inteact with someone who puts them down. But, don't let people walk all over you, either!!!
4) DO NOT manipulate people for being different from you, because that's what it's all about. :) Being DIFFERENT! <3
5) ALWAYS keep a smile! :) Simple as THAT!
6) Get a Myspace! Try to make SceneQueens.com more popular!
(Also Stickam and Buzznet would help!)
7) Then, come to SceneQueen.com, sign up, and ENJOY!!! :)
-HelloKaela. (:
Kalene CrayolaMagic
Here are a couple easy, quick, makeup tips : )
1. How to make your own eyeliner, without having to buy all those expensive colored ones:3
Things you'll need:
-An angle makeup brush
-A little bit of water, 1/4 of a shot glass will do
-Any color of eye shadow you want
Dip your angle brush in the water, and swirl it around in the eye shadow of your choice, you may have to re-dip and swirl a couple times.
Make sure there are no chunks at the end of your brush, they can fall in your eyes D;
Simply swipe along your top or bottom lid, the shadow should come off smoothly and in a relatively thin line. And Presto!
--------------------------------------------------------
2. How to make any color lip stick/gloss you want.
Things you'll need:
-Vaseline/colorless lip balm
-Eye shadow or blush
Simply scoop out a little bit of the vaseline or lip balm and put it in the center of your hand (feel free to use any kind of dish or container, this stuff doesnt really go bad)
Scrape a little bit of your blush or eye shadow into the vaseline and mix. Intensity depends on how much color you add! Finito!
Jack Rabbit Mandie
Dying your hair with "Kool-aid."
Dying your hair with "Kool-aid is a cheaper and safer alternative to using regular dye. You hair will not feel sticky or taste/smell like the color/flavor you used.
What you'll need:
-5+ (depending on the length of your hair) packets of "Kool-aid"
-Conditioner
-Foil
-Gloves
-Bowl
-Spoon.
-hairties/bobbie pins to section out your hair
-comb/brush
First, section out your hair (if not doing your whole head),Next, put on gloves and mix "kool-aid" and conditioner together in a bowl and mix until it's fully mixed. Apply to your hair and wrap with foil and let set in your hair overnight. Wash out like normal dye and you're done!
Hanna Homicide
how to layer cut your own hair :) (read through entire thing before doing any cutting!)
Dampen your hair and comb it straight.
Determine the length and location of your shortest layer.
Pick up the top layer of your hair (use a thin amount, you don't want it to appear chunky).
Use your fingers as a guide and cut unevenly but naturally across
Put in as many layers as you want depending on your hair length
To style your hair, you want to apply a route pumping cream to the ends of your hair (starting about two inches from your scalp)
Pin up all layers. Release bottom layer and blow dry. Slowly release each layer one at a time drying each one.
and you're done :)
xXMrs.PartyHardyXx

How to dye your hair with Kool-aid.
1)Mix the Kool-Aid with Conditioner.
*White Conditioner would work best.
2)Use gloves and apply to parts of the hair
that you want dyed.
*If you don't use gloves your hands will be dyed a funky color. I kind of found that out.
3)Use plastic wrap and wrap up the parts of hair that has the Kool-aid dye in it.
*If you don't wrap it up some how it will get everywhere.
4)Leave it in over night!
*If you don't do this the dye will NOT take!
5)When you wake up get in the shower rinse your hair out, wash it (Only if you want to), Blow it dry, and the you and style it finally.
~Love,
xXMrs.PartyHardyXx
Roxxi's DaBest
My real name is Golfum. I am 15 years old and I like Hello Kitty, my favorite color is purple and i like being different. "Scene" isn't about the behavior, it's the look. People look at us and think, "Oh my gosh!! What a freak!" They think it's ok to talk about us. And yes, I've been judged on how i dress, the way i cut my hair and wear make-up. To be honest, I really don't give a care on what they think or say about me because as long as I like the way I dress they should be happy for me. I don't try to fit in and I don't wanna because me and my friends get out there and cause a scene!! Haha :p. I remember, LONG time ago, I was.. I think 7 or maybe 8??(I dont know!!) and I was at the mall and this random teenage guy started walking and i just kept staring at him, without blinking. He wore a black jacket with a hoodie on his head, black skinny jeans, black shoes, eyeliner, really pale skin, black shoes, black hair and beautiful blue eyes!!! And I shouldn't have stared at him but I did it anyways because on how different he looked. Then of coarse i told my mom and she said that there's a specific name for people that dress like that. And look at me now; i dress nothing like all the other people and im on www.scenequeens.com hoping they'll accept me for the December issue!!! I never imagined looking like the way I look now. I always thought it would never happen to me!!! But guess what?? It did. People also need to know that no matter how different people look they're just like you and me.
Oh! I forgot! If you look at the March Article 8; my friend Mikki is in there!!!
From all the scene queens,
Rooxxi's DaBest
Oh! I forgot! If you look at the March Article 8; my friend Mikki is in there!!!
From all the scene queens,
Rooxxi's DaBest
Keshia Katastrophe

1. Apply stick concealer or heavy cream foundation (to match your skin) all over your face. (optional)
2. Apply loose powder in a shade lighter than the concealer. (Optional)
3. Get both a liquid and a pencil eyeliner in black.
4. Using the black pencil eyeliner, draw a line along the lash line of your lower eyelid to your desired thickness.
5. Then, using the black liquid eyeliner and a fine eyeliner brush, line your top eyelid, starting from the inner crease to the outside end of your lash line. Flare it out for the most dramatic effect.
6. Go over the bottom penciled line with liquid eyeliner.
7. For an even more stunning effect, apply a smudged line of black eyeshadow slightly underneath the eyebrow.
8. Apply several coats of black mascara.
TIP:
If you want to be colorful, put a bright neon eyeshadow on your lids and a little above your crease to get the dramatic effect.
Amanda FreakyKiki
How to look like a Scene Queen(Hair and makeup):
Hair: Make it stand out. Tease it, use a bow, a tiara, headband, bright colors, or coon tails. Do something that makes it really noticable.
Makeup: Dark eyeliner. Put dark black eyeliner around your eyes so they really stand out. Use a bunch of mascara or fake lashes so your eye lashes look big and bold. Use bright eyeshadow (optional). Bright blue, purple, pink, yellow, orange, or green would be perfect. Use some pretty pink blush so your face softens.
Enjoy! ;3
DArlene Breakdownxx
My name is Darlene. Im 13 years old.I think that Scene is a style of your own. There are no rules for you to be who you are..not all people will like you for you.. you don't need piercings, tattoos etc. your beautiful on the inside and out who cares what other people think its your personality your style. if you wanted to be labeled you woud on the the side of a soup can ;3!
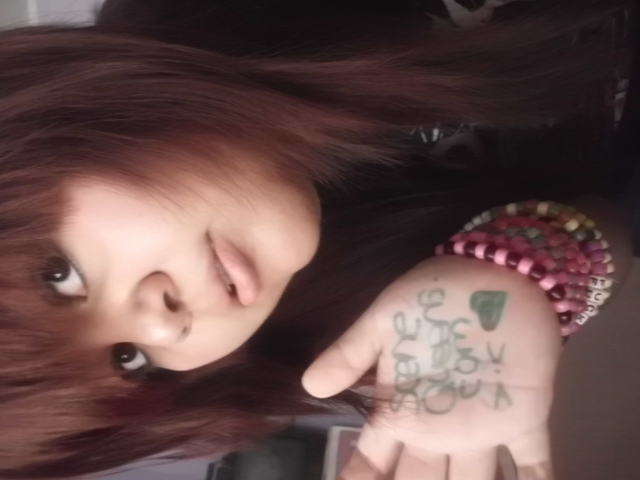
Kailey Marie
Hello(: Im Kailey Marie, obviously(: haha. I blow out my candles on the 4th day of November. I live with my dad, brother, step mom, & 3 dogs. My hair is naturally red, but I hated it so I dyed it. I got my colors done last night, actually. At the moment, I'm single. But once this is up I probably wont be <3 My eyes change from bright blue to grey. Theyre grey at the moment(: I love bands like Black Veil Brides, Asking Alexandria, All Time Low, My Chemical Romance, Breathe Carolina, & many more(: Im from CT, but I live in NC. I take a great interest in photography. Dont be afraid to talk to me, I dont bite. Honest(:
Jessica Jealousyy
How to make a kandi 3D star necklace
What you will need:
approx. 120 beads
Lots of string
and TIME(:
have 10 of a color and 15 of a other
string the 10 first like a small bracelet
then put the string through the top
string on 3 of the 15 beads
REMEMBER TO SKIP 1!!!!!
repeat pattern till u end up where u started
Go through the same bead you started with
Tie it together
Go through each point and add three beads
Go through every single point and just keep adding 3 beads
go through the same one u started with and pull it
TO DO PART THREE MAKE SURE YOU ALREADY DID 2
STARS!!
go through each middle bead and add 5 beads
Continue all the way around
go through the same bead you started with and pull it
put the string through the middle bead on the smaller star and and put the string
through each of the 5 beads on the bigger star
go all around
Remember to tie it at the end, double knot it!
Finally add a string to a tip of the star and tie it now your done!(:
